

Our pantry had been totally disorganized since we moved into this house back in June.
It was one of those thing that I kept saying I’d get to eventually, but it had a bunch of wire shelving in it. And I didn’t feel like organizing it only to do something differently in there later once we decided to remove all the wire shelving.
So I did something that’s really hard for me to do and lived with it! I shut the doors and pretended it didn’t exist.
But since we’re right in the middle of a kitchen renovation anyways, I figured there was no time like the present to take it on!
But here’s the thing… as much as I would have loved to build a custom pantry, I just didn’t want to spend the time or money on it. So instead I transformed our pantry in 2 days using simple steps that anyone can do!
Goodbye wire shelving… hello cutest pantry ever!
Here’s how I did it.

HOW I ORGANIZED OUR PANTRY IN ONE WEEKEND WITH SIMPLE UPDATES
First things first… that wire shelving had to go!
STEP 1: REMOVE WIRE SHELVING AND PATCH HOLES

I took everything out of the pantry and set it in our dining room. This made snacking very convenient all weekend long I must say, which was either a pro or a con… I haven’t decided yet!
Then, I started to take down our wire shelving. I started by opening up all the fasteners using a flathead screwdriver. Then I hit the shelves up from underneath to loosen them and take them out.
Once the actual shelves were out, I pried off the support bars and started on the fasteners.
If you have similar wire shelving, these fasteners aren’t secured by screws – they’re just anchored into the wall! So a screwdriver won’t take them out.
I take a flathead screwdriver and pull them away from the wall then grip them with some pliers to pull them out.
This takes a minute, and I suggest wearing gloves because it might hurt your hands!
Once all of your fasteners are out of the wall, you’re likely left with a whole bunch of holes. Take a sanding block or some sandpaper and sand them down.

Fill the holes next. I like to use joint compound and a putty knife for this step, but there are a lot of ways you can patch holes in walls! Over fill your holes and let them dry completely.
Once your joint compound is dry, come back and sand it down so it’s flush with the wall and paint over it!
STEP 2: WALLPAPER
I knew I wanted some cute wallpaper in our pantry ever since I saw this wallpaper from the Nesting with Grace collection at Tempaper Designs! I mean how cute are these lemons??
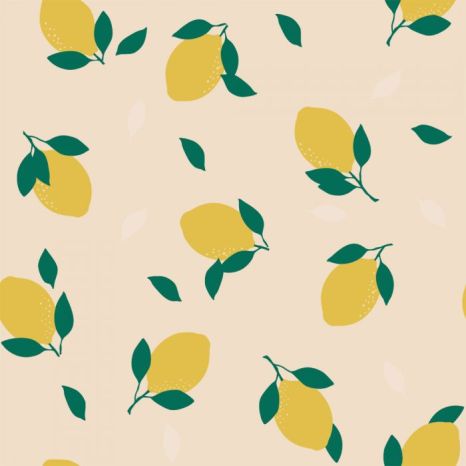
This wallpaper is peel and stick, and I knew it would help not only cover up my holes in the wall but make a cute statement! What better place to have a little fun than the pantry?
I decided to just wallpaper the back wall. Starting at the lefthand side, I peeled back a little bit of the paper backing and placed my paper on the wall, making sure it was nice and level (because our walls aren’t!).
I used a wallpaper smoother as I moved down the wall to work out any bubbles! Then I used a utility knife to cut my wallpaper at the baseboard line.
To line up the next panel, I like to peel back a little more wallpaper than you think you need to start and find one spot to match the pattern.
Once it’s matched, match some of the pattern directly above and directly below, make sure it’s level, and smooth it out, up, and down!
Continue until your wall is completely covered in cute wallpaper!
This is the wallpaper tool kit I have!
STEP 3: MAKE YOUR SHELVES

This is such a simple solution for anyone who doesn’t like their wire shelving! Just use some wood and brackets to create shelves!
I used these brackets from DIY Cartel with 1″x12″x10′ commonboard.
These brackets are nice and sturdy, holding up to 110 pounds with a set! They’re J brackets, so they don’t get in the way like the wire supports did, and they fit a 1″x12″ board perfectly!
The nominal width of the board is 12″ but the actual width is 11.25″, and these brackets can hold boards up to 11 3/8″! Talk about as close to perfect as you can get without having to cut your own width!
I cut down my boards to fit the length of my pantry (5′) and started measuring where I wanted them to go!
I had a lot of larger baskets and containers for my pantry, so I opted for 13″ between each shelf, but you could do whatever works best for you.
I started by measuring based on the baskets I had for the floor and placed my first bracket into the wall.
I put my brackets 12″ in on either side, which isn’t where we had studs in this wall. So I made sure to use drywall anchors to secure these brackets into the wall!
I held up a bracket, drilled my pilot holes with a small drill bit, and screwed my anchors into place before screwing my brackets into the wall.
To make sure my shelves were perfectly level, once the first bracket was in place, I placed my board in and grabbed my second bracket. I held everything where it was supposed to go and made sure the board was level. This is important because sometimes your boards can be warped, so if you simply measure for your brackets, they might still be off.
Holding everything level, I drill my pilot holes for the second bracket before sitting everything down to secure my drywall anchors and second bracket!
This helped me get every bracket right the first time with no do-overs!
Then I made sure to secure the boards into the brackets using the small screws that came with them.
STEP 4: ORGANIZE!

Once the shelves are in, it’s time for the fun part! There’s just something about putting things that come in containers into prettier containers, am I right?
I grabbed a bunch of baskets and containers and got to work. And I actually had a lot of fun with this!
This is a step you can totally make your own, but here are some of the baskets I used to organize my pantry…
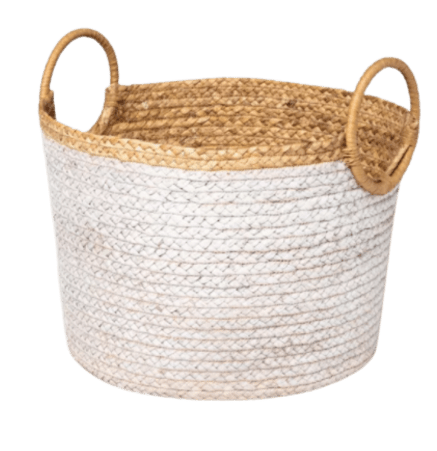
SMALL ROUND SEAGRASS & WHITE BASKETS

RECTANGULAR SEAGRASS BASKETS WITH HANDLES


Happy organizing!


[…] had already updated our pantry on the inside (click here to see what we did!), but the doors were builder-grade double closet doors that didn’t add anything at all to the […]