

When we moved into our new home, there were several projects I already had mapped out in my head. I had mentally been designing spaces for weeks!
But I knew I wanted to start small and figure out the exact look and feel I wanted to go with for this house. And when I’m starting small, instead of simply choosing one project to do in the house, I like to choose one small space to update.
Why? Because one DIY, while progress (don’t get me wrong) doesn’t always help me see the full vision for the room. But when I choose a small room to redo or refresh, the vision comes together, and it usually inspires me in a bigger way for the next project.
So as soon as we moved in, I had my sights set on the half bath. It was the smallest space in the house, needed tons of love, and is something we’d see every single day.

HOW I COMPLETELY REDID MY HALF BATH, ONE DIY AT A TIME
PHASE 1
I took a look around. This space was dark, dated, and had a 90’s traditional look and feel which simply wasn’t our style.
But it was a small space, and I knew with some adjustments, it could be perfect!
But before we get started… here’s a quick look at the before!

PAINT
The walls started as a yellow-beige (throughout the whole house), but we painted them Chantilly Lace by Benjamin Moore as soon as we moved in to brighten it up.
That immediately helped!
But between the mirror, the sconces, the dated hardware, the dark granite, and the black cabinets, it still needed some love.
I started with the things I had on hand.
ONE THING AT A TIME!
I found some peel and stick wallpaper in a folk tulip pattern that I was holding onto for the perfect project.

I decided to place it behind the mirror above the vanity and along the arch in the bathroom to help it stand out a bit.
That was simple — I just peeled off the backing, used my level and smoother to install it, and used my exacto knife to cut along my edges. I have this wallpaper tool kit, and it always comes in handy!
Next up, the mirror! When I took out the original mirror, I knew it wasn’t going back in!
I found at Hobby Lobby a while back that I had used in a hallway in our last house. I knew between the detailing and natural wood it would be perfect! It’s unfortunately no longer in stock, but I would have also used something like this!
Once the mirror was up, we set our sights on updating the sconces! They were dated and simply not us! But we had found these pretty warm brass sconces we knew would be perfect in here!

They were nice and simple to install, then we used some Edison bulbs for added design!
Next up, the towel ring! I had these cute hooks from Target that I had purchased several of for this house. I thought it would go perfectly with the brass sconces!
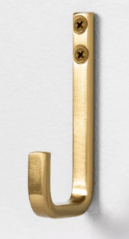
So we removed the ring and replace it with the hook. Nice and simple! And it made a huge difference.
Then, of course, I had to add one of my favorite Olive & Linen towels — the Marlowe hand towel! I have these towels all over my home, and you can use my code FARMHOUSEISH30 to save 30% on the whole site!

Now that it seemed like we were going from top to bottom, I set my sights on the vanity… it needed to change… the countertops more than anything!

But we certainly didn’t want to shell out for new stone countertops just yet. So I found a DIY where you could create faux marble countertops using paint and epoxy, and I got to work. Head here for the full tutorial!

Of course, once that was done, it looked SO much better, but I still couldn’t live with the black cabinets! As much as I wanted to keep them, I was craving light and airy.
So I painted them Gatherings by Magnolia, and it was the perfect choice! I couldn’t be happier!

Because it’s always an easy and impactful update, I then replaced the knobs with these gorgeous flat black mushroom knobs, and it was the perfect update!

And just like that, all those mini updates turned into one huge bathroom refresh, and I couldn’t be happier! But one thing was missing… shiplap!
SHIPLAP

I removed the moulding from around the window, installed my shiplap quickly and easily using drywall screws, and caulked around the edges.
Then I painted it my wall color – Chantilly Lace by Benjamin Moore.
Last but not least, we framed the window using 1×4 select pine and whitewashed the wood with the same paint! It warmed it up and modernized it in a way we never imagined possible!
Then for the finishing touches…
I added this cute jute rug…

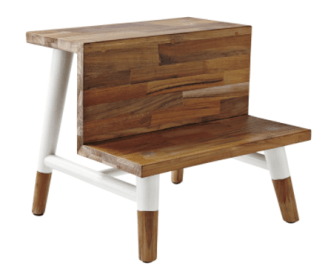
And this adorable step stool for my girls…

And it came together just like I had it in my mind. Totally us, and totally changed! And I have to say it completely inspired me to take on the rest of the house!
I left it like this for about a year, then I decided to dive back in for phase 2 of this project! I needed to correct some mistakes and was inspired to take this room a step further!
PHASE 2
After about a year had passed and I’d learned some new DIY skills, it was time to take another look at this bathroom!

VERTICAL SHIPLAP
When I installed the shiplap and window trim before, I didn’t do it quite right. I failed to remove my baseboards and moulding, and I didn’t use long enough shiplap boards.
Time to correct that!! I removed everything from the wall to start fresh. Then I added a 1×6 MDF board as my baseboard, reinstalled the window trim BEFORE I installed the shiplap (using the same 1x4s), and cut down 12 foot boards to use for this space so they could go from floor to ceiling without breaks.
I then reinstalled the moulding at the top, caulked around all the edged, and painted it all Pure White by Sherwin Williams!
I also went ahead and painted the rest of the trim in this room to match!

It probably wasn’t something you’d truly notice if you didn’t know what you were looking for, but correcting these mistakes made a world of difference!
TILE BACKSPLASH
I also replaced the wallpaper on the arch with this cute twigs wallpaper! It just went better with the tile!
I used this thinset mortar, a trowel, and 1/8 inch spacers to install! I also used my trusty wet saw that I’ve used for several projects here! Unfortunately, my stopper broke this time around, but I didn’t let that stop me from finishing this wall!

I finished it with Bright White Simple Grout, removed the haze, then hung up our fun mirror using a bunch of picture-hanging command strips! Then I made sure to caulk around where the tile met the wall, ceiling, and countertop for nice clean lines.
Isn’t it just perfect?
COUNTERTOP & FAUCET
Previously, I had done a marble epoxy look over my granite countertop in here! But I had also epoxied around the faucet… which ended up breaking on us!
So I removed the faucet, sanded down the countertops just a little bit, and used Rustoleum Appliance Epoxy paint to bring the countertop back to life!
This paint was super easy to use! I sanded the countertop, cleaned it and let it dry, then rolled on one coat with a foam roller and brush to get the edges. I recoated within one hour, then let it cure! EASY and awesome solution if you ask me!

Now our countertops match our tile so much better, and you’d never know I had to cut out my faucet!
CHANDELIER

And last but not least… The back of the bathroom needed something to help it pop. There were lots of black accents with the tile and faucet, but nothing to balance out the other side of the room. Cue beaded chandelier!
I used a recessed light converter kit to go from a recessed light to a gorgeous chandelier.
And that’s it!! Just a few more simple updates to take this half bath from unfinished to PERFECTION!
Do I have plans for a Phase 3? Not yet! But I wouldn’t be surprised if come a year from now this space gets a few more additions!
What’s your favorite part??


Awesome project!!!! It looks amazing!!
Thank you so much!!