

*This blog post is sponsored by WoodStock Walls and reflects my true opinions on the product.*
When I was working through projects and updates in our basement, there was one room that I kind of skipped over. Our guest room.
It wasn’t because it wasn’t deserving of a makeover. I just didn’t have a true plan for how that space should come together yet. Not to mention, I didn’t want to have to replace a bunch of furniture and decor in there just to give it a makeover.
So I decided to simply paint a wall, add some fresh pillows, and be done with it.

But ever since then, the wheels have been turning in my mind. I’ve been constantly thinking through ideas and ways to update that space to fit in better with the style throughout the rest of my home.
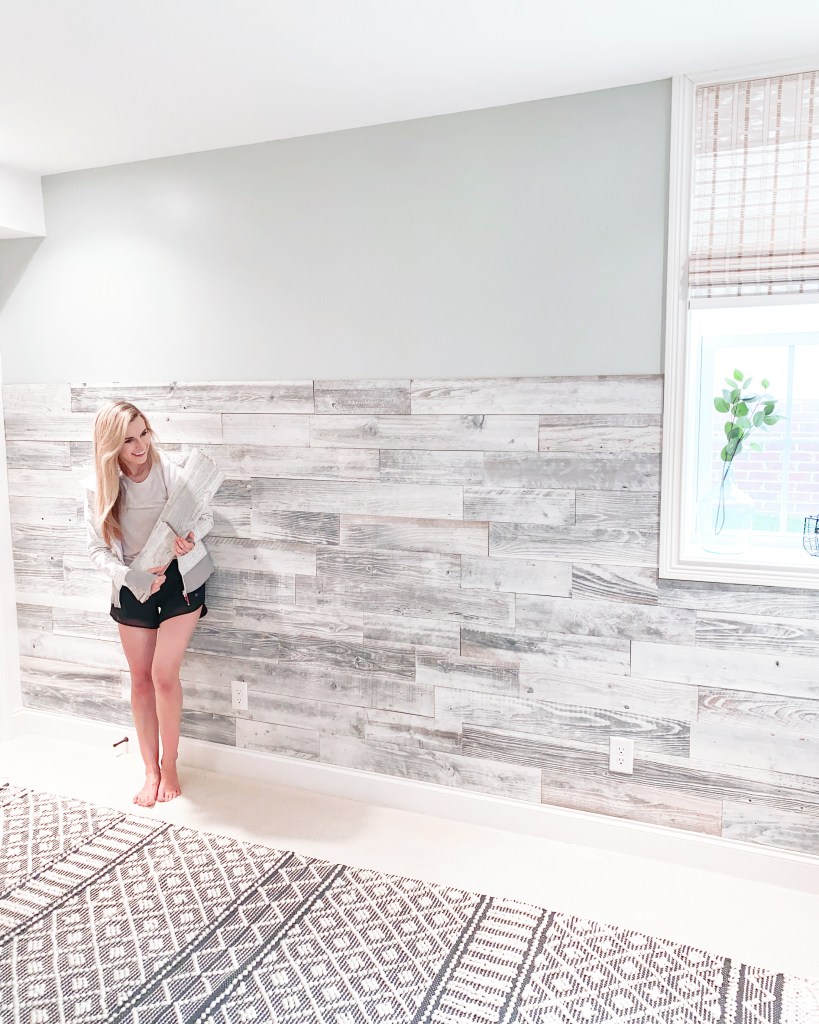
I fell in love with their Board Wash planks and dove into the makeover head first to see just how well these planks could transform our guest room.
Spoiler alert…

HOW I USED WOODSTOCK WALLS RECLAIMED WOOD PLANKS TO TRANSFORM OUR GUEST ROOM FEATURE WALL
STEP 1: MEASURE & GATHER YOUR MATERIALS
First things first, I needed to come up with a plan and gather my materials! I figured out the square footage of my wall, ordered my materials, and got the tools that I needed ready!
Here’s what I used…
And here are the tools I needed…
STEP 2: ALLOW YOUR BOARDS TO ACCLIMATE PRIOR TO INSTALLING

Because these are reclaimed wood boards, they need some time to acclimate to the new climate where they’ll be living! Take your boards out of the box and allow them to acclimate for 72 hours prior to installation!
While you wait, come up with your design plan for the rest of the room so you can hit the ground running when they’re ready!
STEP 3: INSTALL YOUR BOARDS
Boards from WoodStock Walls can be installed in two ways: with their proprietary Click & Stick Method where you use their adhesive in the grooves on the back of the boards to adhere them to the wall, or with nails.
Click here for the full installation instructions!
The Click & Stick process differs from peel and stick boards in one major way in my book. With peel and stick, you’ve got one shot! Once you stick it to the wall, it’s going to stay there!
With WoodStock Walls‘ adhesive, you have a few minutes to adjust your boards and make sure they’re level prior to it drying. Talk about less stress!
This is a great method if you know you won’t be changing up your feature wall anytime soon. Adhesive works wonders, but it is harder to remove from your walls than nails!
I opted to install my boards using my finish nailer since I tend to change thing up often!

I started in the bottom lefthand corner of my wall with my first board. I made sure it was level first, then nailed it to the wall by angling my nails in. That way, they can’t be easily pulled out when they aren’t going into a stud!
Move from left to right on each row, alternating all the different size boards as you go.
When you get to any outlets, carefully mark your cuts and cut them out with a jigsaw, and use your miter saw to trim boards when you get to the end of each row.
Continue this process until your wall is complete!
STEP 4: CAP YOUR WALL WITH A 1X2 (OPTIONAL)
I decided not to go all the way to the ceiling with my boards and instead added a 1×2 trim piece at the top to create a faux headboard for our guest bed.
I whitewashed my 1×2 with a ratio of 1 part Linen White Chalk paint and 3 parts water so it would match the other bleached furniture in the room, then I used my finish nailer to secure it into place after I made sure it was level.

STEP 5: DECORATE
Of course, once your wall is done, it’s time to decorate! Pull your room together and admire your newly transformed space with the help of WoodStock Walls!
I was easily able to finish my wall in 2 days and moved right on to building a barn door with my leftover boards!

Follow me on Instagram to watch this barn door come to life!


Leave a Reply